Connect apps with MCP servers
Connect remote MCP servers so the AI can use tools from other apps and services.
Written By Sujeevan Nagarajah
Last updated 22 days ago
MCP is a standard that lets an AI app use tools supplied by another service. In Vinaa, you connect a remote server by URL, then choose which tools the AI may use and when it must ask permission.
Vinaa supports remote servers only. You cannot add a local command or a stdio server.
Add a connector
Open Vinaa → Settings → MCP Servers.
Click Add Server in the toolbar.
Choose a connector: GitHub, Linear, Notion, Sentry, or Atlassian.
Review its server details.
Complete the authentication fields shown for that connector.
Click Add Server.
Complete browser sign-in if prompted.
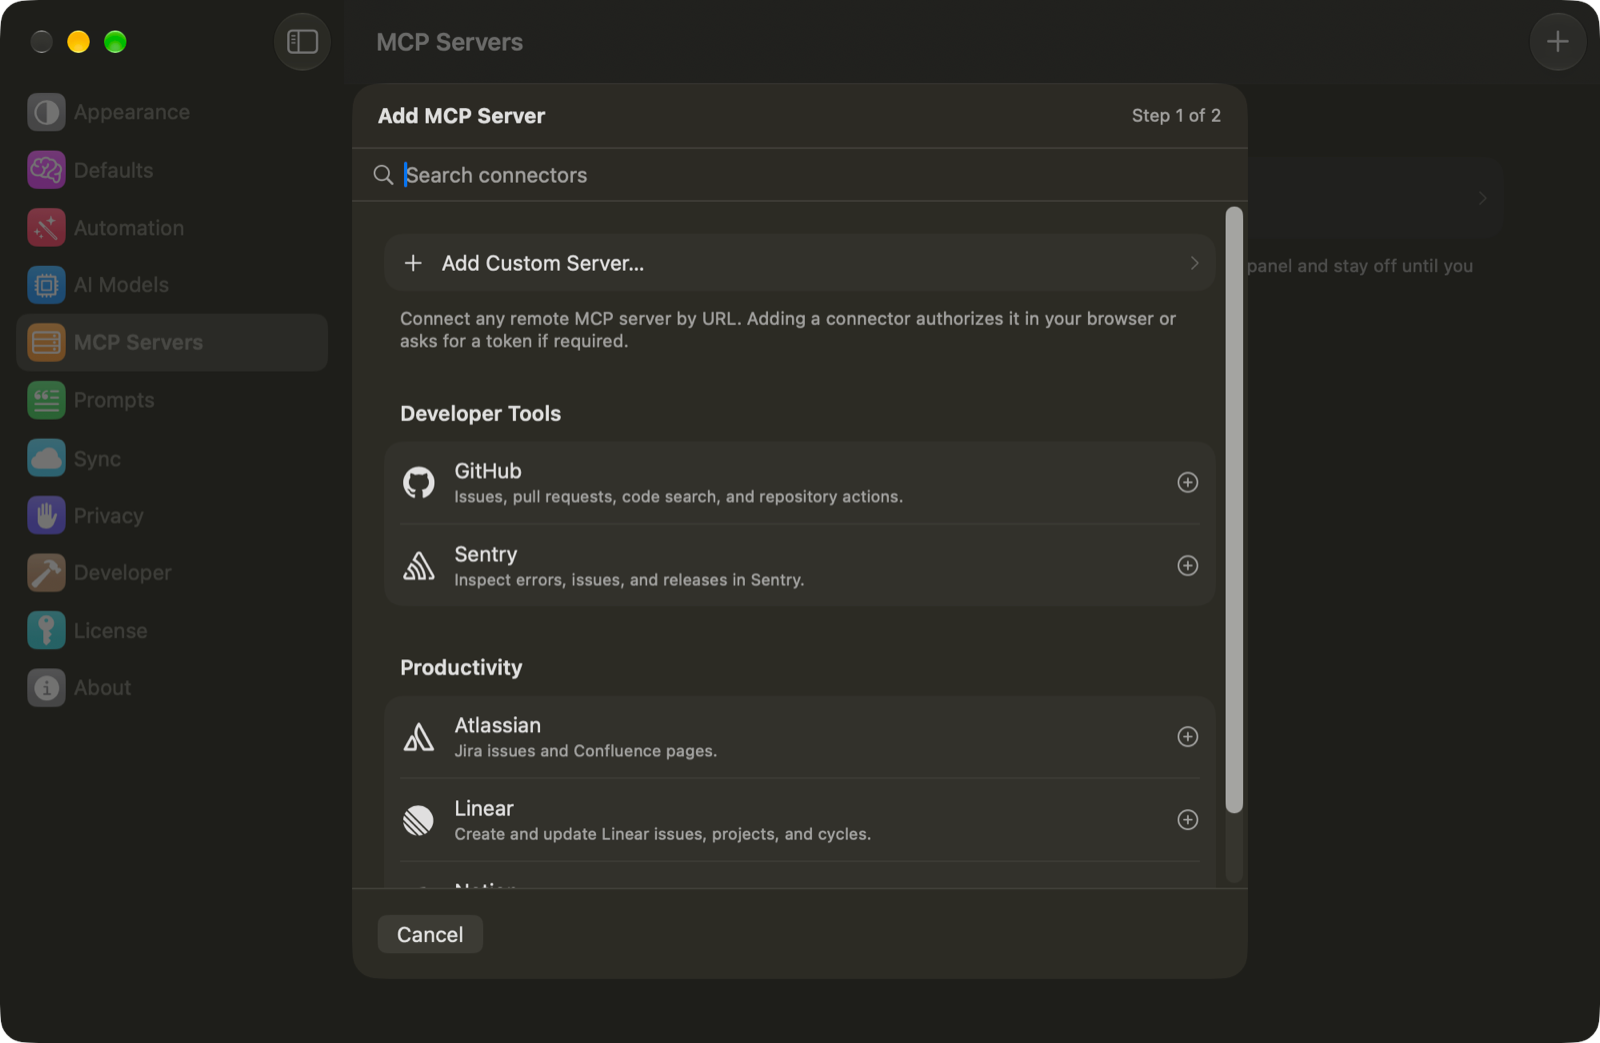
For browser sign-in, use the account you want the AI to work with. GitHub's catalog entry uses an API token by default; it also offers an advanced OAuth app option. Other catalog connectors offer browser sign-in.
Add a custom server
Click Add Server in MCP Servers settings.
Choose Add Custom Server….
Enter a Name.
Paste the service's HTTPS endpoint into Server URL.
Choose the Transport required by the service: Streamable HTTP or SSE.
Choose an Authentication method.
Fill in any required credentials.
Click Add Server.
Authentication choices are:
No authentication: for a public server.
Sign in (OAuth): sign in through your browser.
OAuth app (advanced): supply an app's Client ID, optional Client Secret, and Scopes as required by the service.
API token: paste a personal access token or API key into Token.
Use Custom Headers → Add Header only if the service requires extra request headers. Tokens, OAuth credentials and custom headers are kept in your Mac's Keychain on this device.
Enable tools and set permissions
Select the server in MCP Servers settings.
Keep Enabled on.
Click Connect or Authorize if needed.
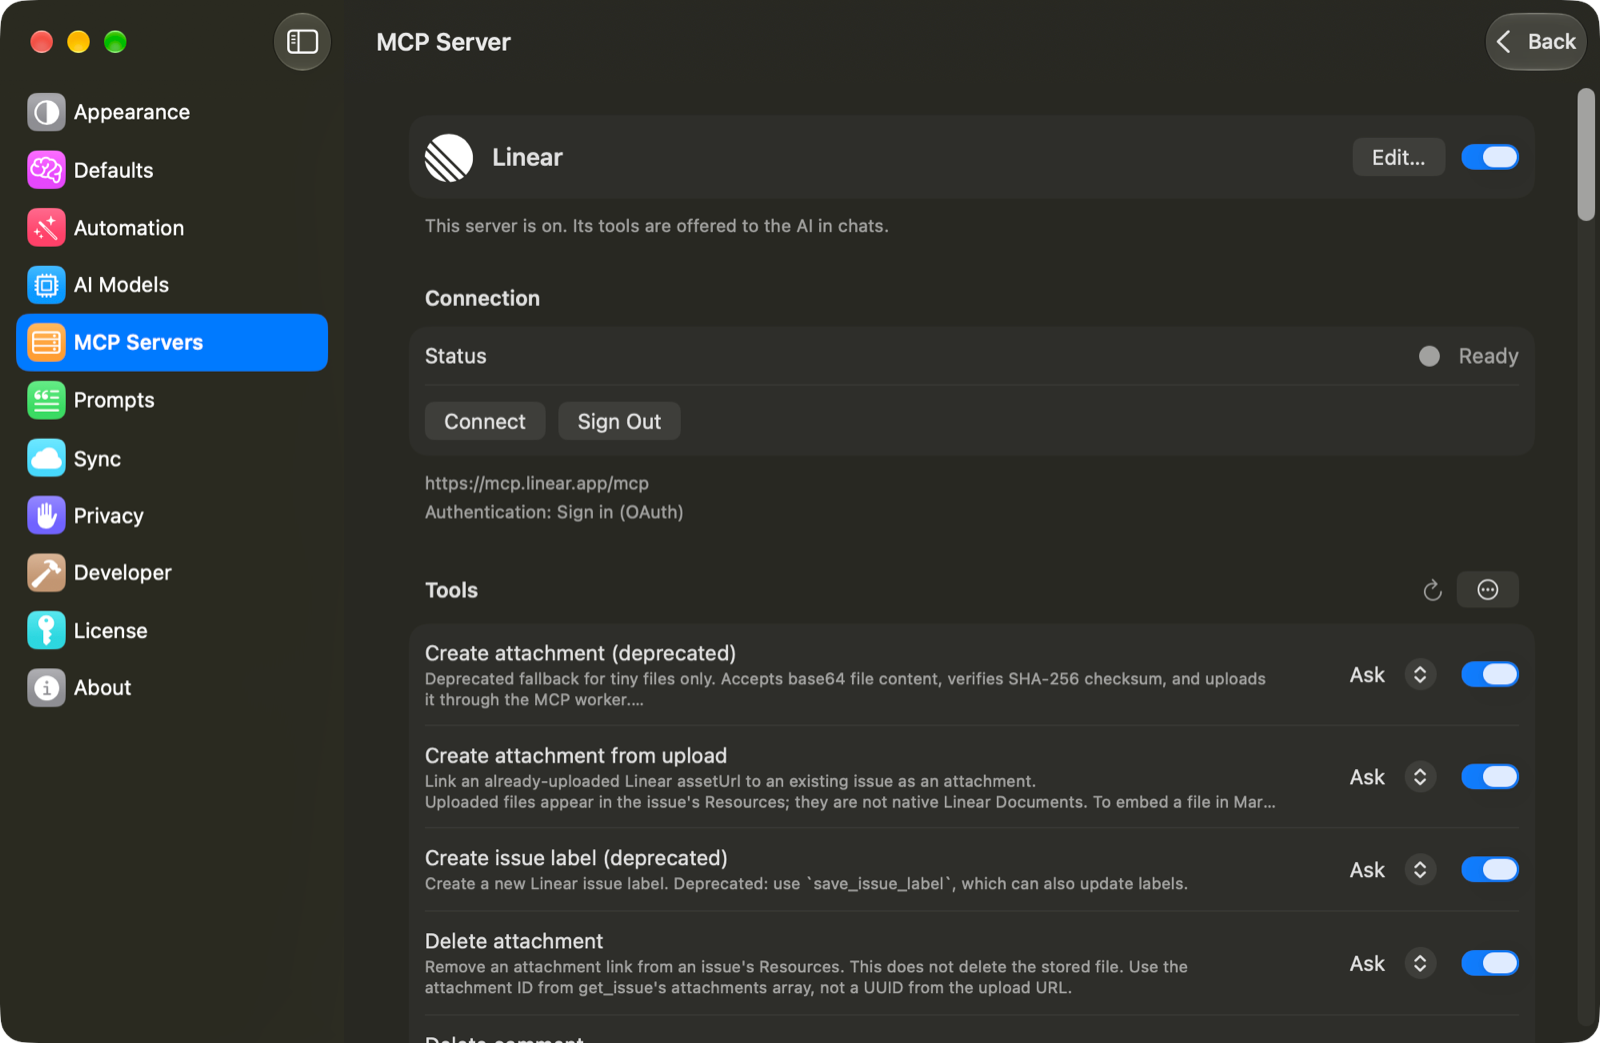
Enable the tools you want under Tools.
Set each tool's Permission.
Choose Ask to approve each use, Always allow to run without asking, or Never to prevent use. The bulk-actions menu can Enable All, Disable All, or Set Permission for All. Use Refresh Tools if the server's tool list has changed.
In your chat, press ⇧⌘T and select the available tools, or use Tool Finder to discover them when needed.
Approve an action in chat
When a tool needs approval, read the Run …? card. Expand Arguments to inspect the information the AI will send.
Allow Once approves this call.
Always Allow saves permission for future calls to that tool.
Deny rejects this call.
Deny and Never Allow, beside Deny, blocks future calls to that tool.
Related articles
Use AI tools
Read thinking, steps and sources
Fix AI connection problems
Was this helpful?
Still need help? Ask the team