Add a custom OpenAI-compatible API
Connect Vinaa to a model server or service that accepts OpenAI-compatible chat requests.
Written By Sujeevan Nagarajah
Last updated 22 days ago
Use a custom connection when your service is not listed in Vinaa. “OpenAI-compatible” means the service accepts requests in a format also used by OpenAI; it does not mean you need an OpenAI account or key.
Get your server details
Ask your service provider or server administrator for:
The base URL: the address under which the server provides its chat and model endpoints.
Its authentication requirements: an API key, custom headers, or no authentication.
The exact model IDs if the server does not provide a model list.
An API key is a secret credential that allows Vinaa to use the service. For a local server, start it before connecting.
Configure the connection
Choose Vinaa → Settings → AI Models.
Click Add Connection in the toolbar.
Choose OpenAI-Compatible API under Custom.
Enter a Name for the connection.
Enter the server's Base URL.
Under Authentication, set Method to API Key or None, as required by the server.
If using a key, paste it into API Key.
Click Detect.
For example, a base URL might be https://api.example.com/v1. Do not include /chat/completions at the end: Vinaa adds that path. Detect looks for a model list. If Vinaa finds models at a corrected address, click Use This URL.
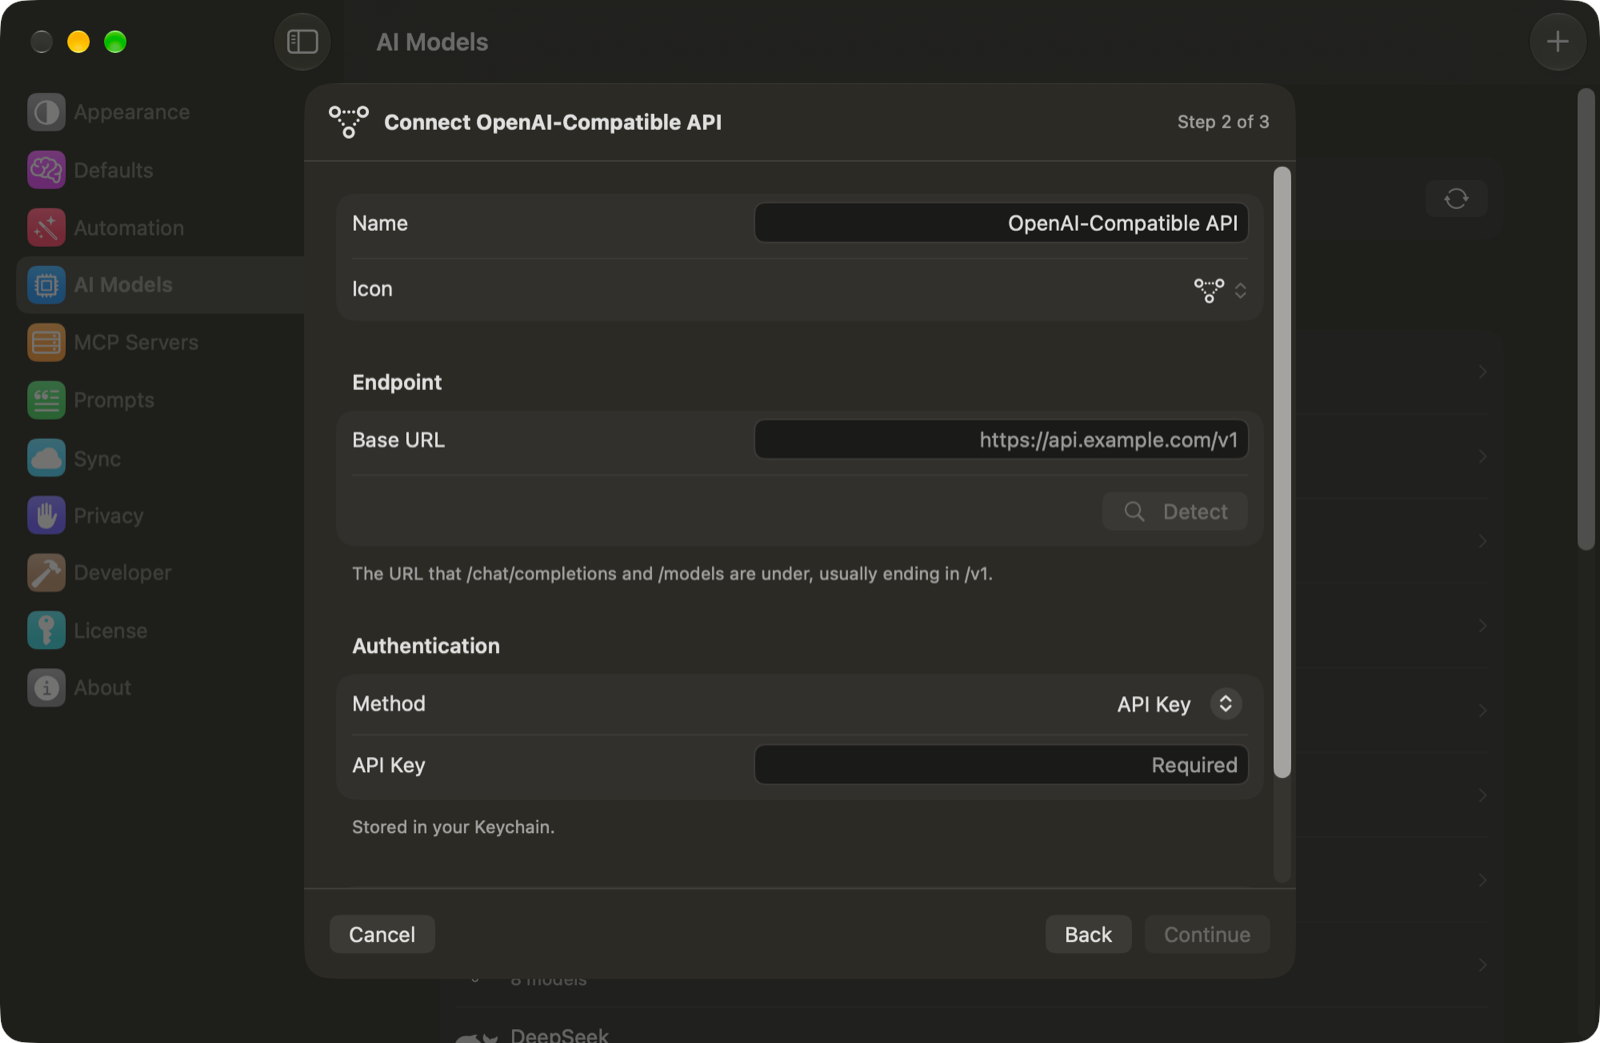
If your service has built-in support, Vinaa may offer Use followed by its provider name. Choose that option to use the built-in connection, or Continue Anyway to keep the custom setup.
Add custom headers if needed
Headers are extra name-and-value settings sent with each request. Only add headers specified by your provider or administrator.
Expand Custom Headers.
Click Add Header.
Enter the Header name supplied by your service.
Enter its Value.
Click Add.
Keys and custom headers are stored in Keychain. A custom Authorization header can supply authentication instead of the API key field.
Choose or add models
Click Continue.
In Choose Models, select the models you want.
If no model list is available, click Add Model….
Enter the exact Model ID supplied by the service.
Set the model's limits and capabilities to match the service's documentation.
Click Add.
Click Add Connection when your selection is ready.
The Add Model… steps are only needed when adding a model manually. You can also use them to add a model missing from the server's list.
Correct model capabilities later
Open the connection in AI Models. Double-click a model, or use its context menu's Edit Model… action.
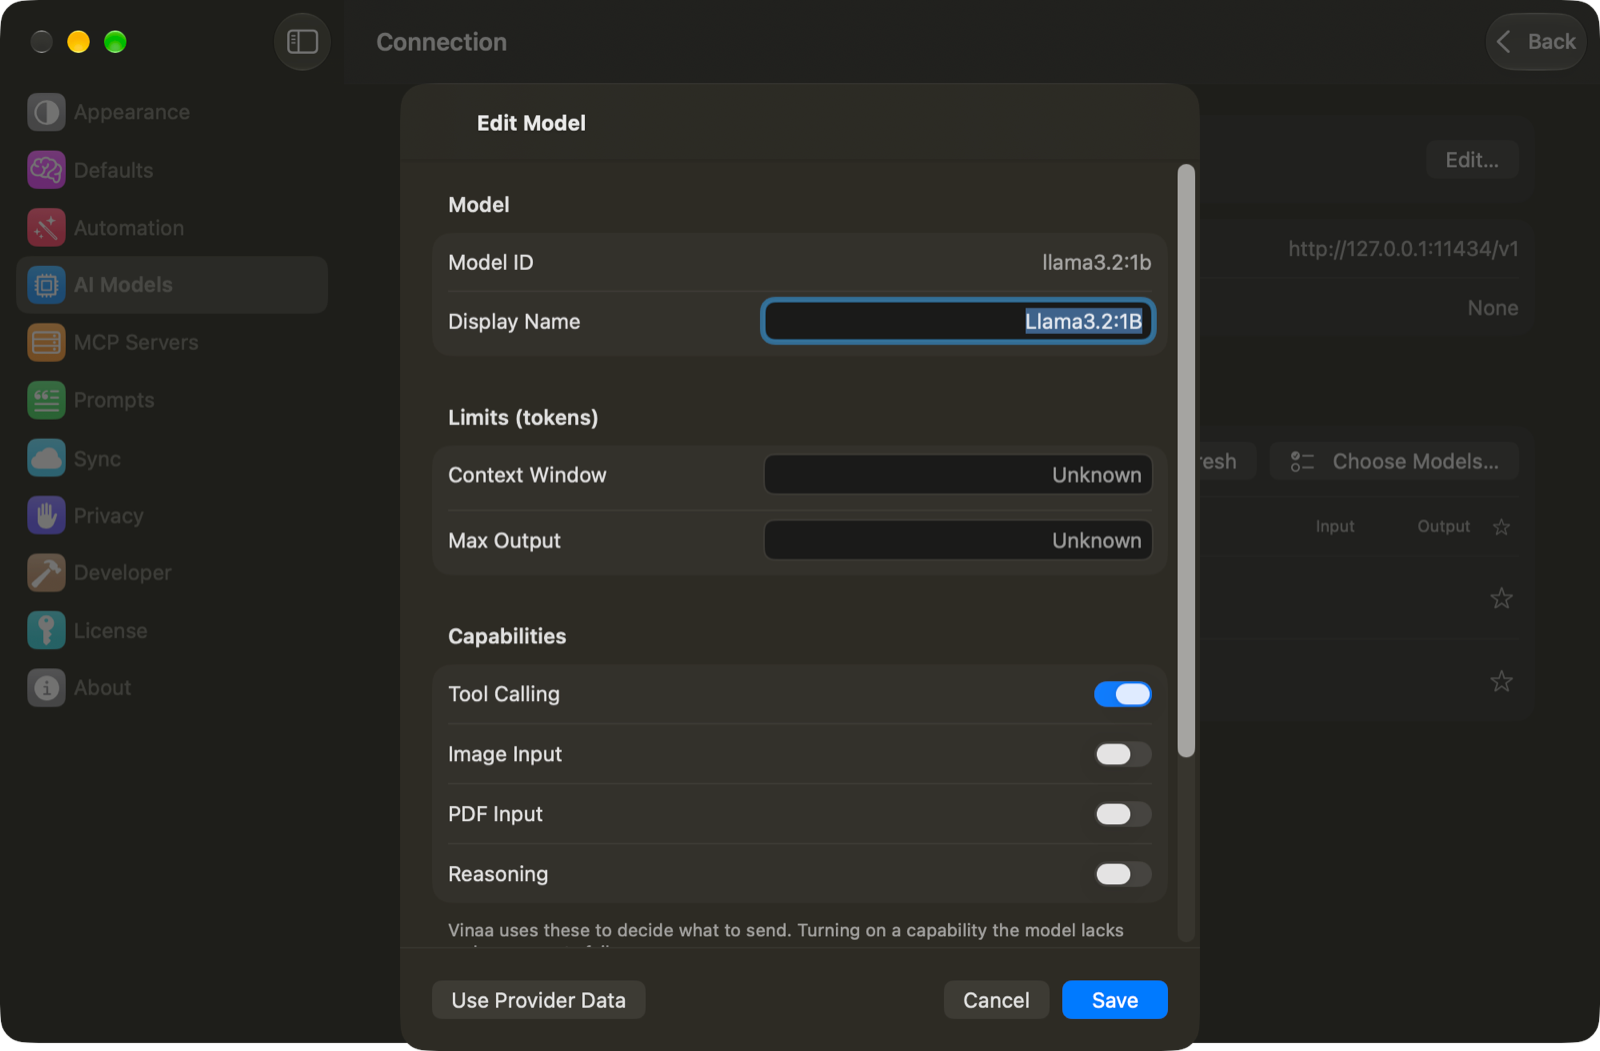
Context Window and Max Output are measured in tokens—small pieces of text. Enable Tool Calling, Image Input, PDF Input, or Reasoning only if the server and model support them. Enabling a switch does not add that ability to the model.
Click Save to keep your changes. Use Provider Data, when available, restores the information supplied by the server.
Related articles
Connect other AI providers
Run models locally with LM Studio
Choose a model for a chat
Fix AI connection problems
Was this helpful?
Still need help? Ask the team